Archive for October, 2008
October 16th, 2008 - No New Stuff
I still haven’t sewed anything. I am out pricing bathroom vanities. Should I go custom or stock? The ones that are mass produced don’t look all that great. And then some of the custom made ones are so expensive that I think that the cabinet makers are nuts. I wish that I knew how to build cabinets. My neighbour knows how but he is a very busy person. One time he made an armoire and I asked my hubby if he wished to do that kind of thing and he said it didn’t interest him. Anyway this adventure takes lots of my spare time. Plus I have company coming on Friday night and I have to clean. Well maybe I’ll just a page out of Ada Moyles book Crazy About Quilting: Confessions of an Average Quilter “Just light some candles and turn the lights down low”. You got to love that!
That’s all for now.
M-K
October 14th, 2008 - Nothing New Again
 Once again I have nothing new to show on any front. But since I was under the weather I have finally decided to get a move on the bathroom renovation. We have a general idea of the style and colours. Now we just have to price everything out and look at the timetable and get a move on it. I want it to be completely finished by Christmas and I mean completely. No little things to do because they will never get done. That means my quilting and stuff will be going mighty slow for the next while. I had better get really organized to make sure all the Christmas quilts are completed on time. And I have to make sure that the hubby’s anniversary quilt is completed by Nov 2nd or else I’ll be toast.
That’s all for now.
M-K
October 12th, 2008 - Another Semi Finish
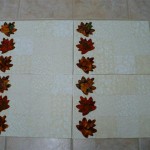
Well I started a few placemats for Meals On Wheels last Sunday. I looked through almost everything to find a pattern or an idea or some kind of inspiration. Finally in a flyer from Keepsake Quilting that came with a magazine I found a pattern that appealed to me. You use charm squares and cut out shapes like butterflies, leaves or hearts, I chose leaves and appliqued them down one side of the charm squares that were sewn into a 3×4 grid. I got that far and then it hit me. I was sooooo sick for 4 days that I didn’t do anything but lay on the bed or visit the bathroom. I lost 9 pounds in the first day. It makes me really frustrated when I can’t sew but I know that my health should come first. That doesn’t mean that I’ll be going to bed early instead of quilting on good days because then quilting comes first. I did the easy way of joining them so I don’t have to put on any binding because that would take forever.
Â
All I need to do is some quilting on them and they are good to go.
Â
Â
Â
Oh by the way, that’s a great idea Becky, I’ll have to get some Scotchguarding and give it a shot.Â
Well that’s all for now.
Talk to you later.
 Mary-Kay
October 6th, 2008 - Cupcakes
The lqs Quilting Confections is celebrating National Cupcake Day October 17 2008.
You buy the background fabric and the pattern for $5.- and bring it back before October 10 and you get $5- off your purchases that day. Your block is then entered into a viewers’ choice vote. Here is my block. I sewed over some batting for the top layer of icing and then embellished it with some seed beads. It didn’t turn out exactly the way I wanted it to but it was fun experimenting . All the blocks are going to be put into a quilt for charity.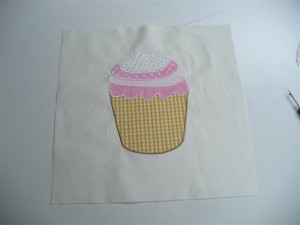  Well that’s all for now.
Mary-Kay
October 4th, 2008 - Pumpkins and Snowmen
Here are a couple of pics of some completed projects.
Â
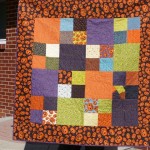
Here’s a kit that I bought last year at Hearts to Holly in Charlevoix, MI. It’s called 4 squared by Valerie Krueger, daughter of Sue who owns the shop. It uses charm squares and fat quarters. Sews up really quick and easy, just in time for fall.
Â
Â
Â
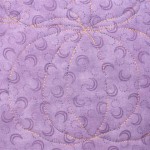
Here’s a sample of the quilting that I did it. I used a quilting pattern from Mary Covey and Rainbow thread that is black and orange from Superior Threads. I think it came out pretty neat. I like the way the pumpkins look. I have another Halloween kit from the same shop that I am going to use the same quilting pattern on. Hopefully I’ll have enough thread.
Â
Â
Â
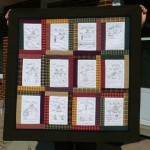
Here is the completed Snowmen Stitchery. I might add some more quilting to it but otherwise it’s done. When I stitched the indiviual squares I stitched the black that goes around each square. I should have waited until it was in the quilt top form and then stiched it. But the black would show up on the light coloured backing so maybe it’s okay after all.
Â
Â
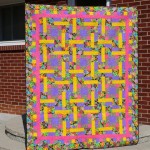
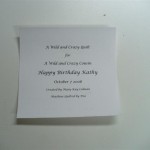
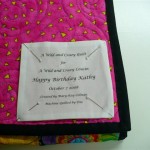
 And last but not least here’s the wild and crazy quilt that I gave to my cousin for her 60th birthday. She has always wanted a quilt. I hope she enjoys it especially when she moves up north when her husband retires. Maybe I’ll have to make her a few more.
Â
That’s all for now.
 Talk to you later.
M-K
